
In this topic
- Introduction
- Important Information
- Employer Registration
- Employee Registrations
- Period Reporting
- JobMaker Average Hours Test
- JobMaker Period Reporting
- Adding JobMaker Paycodes
- Processing Payroll
- Additional Resources
Introduction
The JobMaker program is a Federal Government subsidy to encourage increased employment individuals aged 16 to 35 currently receiving government payments. Employers receive a weekly subsidy for a period of 1 year from the employee’s commencement date.
Important Information
For assistance in determining if your business is eligible for JobMaker you should consult your accountant or the ATO. AussiePay cannot assist you in determining your eligibility for JobMaker.
Details can be found on the ATO Website at https://www.ato.gov.au/General/JobMaker-Hiring-Credit/.
Employer Registration
If you determine that you are eligible for JobMaker you will need to register your business. You can do this via the ATO Business portal. Alternatively, your Tax Accountant can do this for you.
During the Registration process you will need:
- Active Head Count as of 30th September 2020
- Total Payroll $ for the period 7/7/2020 to 6/10/2020
Active Head Count as of 30th September 2020
On Demand Reporting - Select Employee Info (Excel)
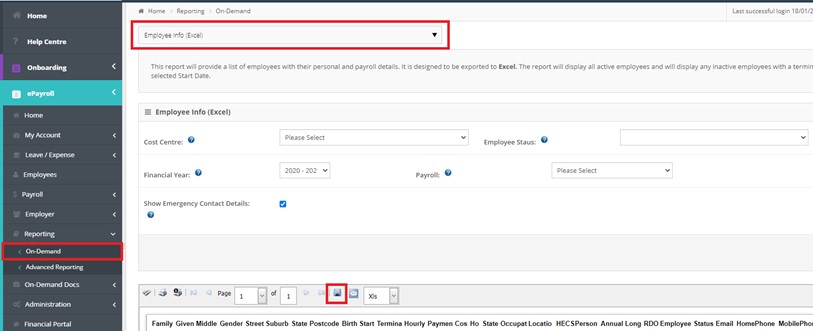
Download the report and open in Excel
In Excel Filter:
- Start Dates of 30th September 2020 or earlier
- Termination dates 1st October 2020 or later
Count total number of employees
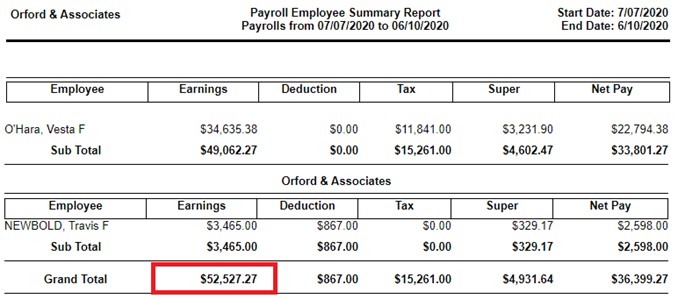
Total Payroll $ for the period ending 6th October 2020
On Demand Reporting – Select Payroll Employee Summary
Filter Start date 07/07/2020 End date 06/10/2020
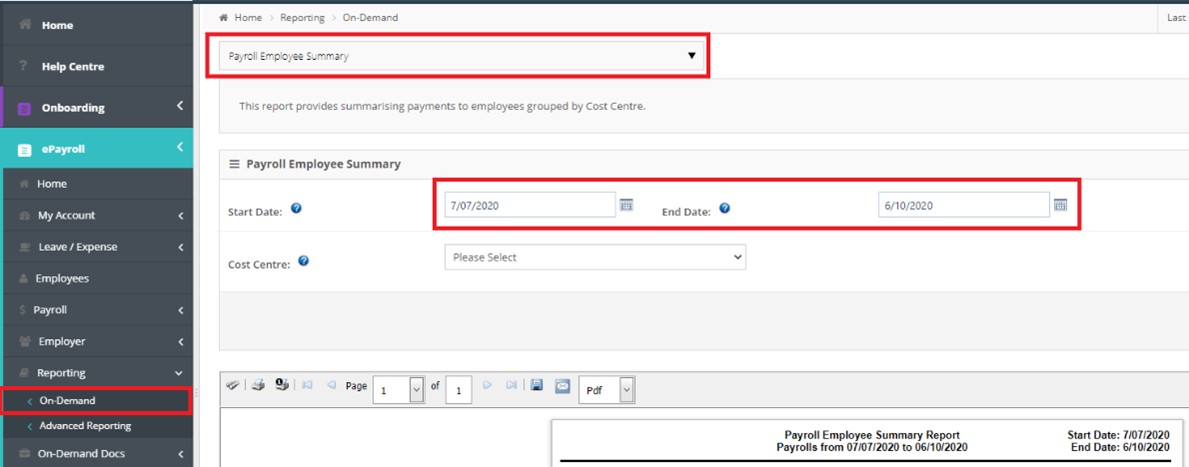
Go to the last page and use the Grand Total in the Earnings Column.
This is the Total Earnings before tax and any salary sacrifice deductions.
Employee Registrations
You should check an employee’s eligibility before nominating them for JobMaker. Please refer to the ATO Website for the most up to date eligibility.
Employees that meet the JobMaker eligibility need to complete a JobMaker Hiring Credit Employee Nomination Notice.
On receipt of a completed form, you can nominate the employee via STP by processing a 1c payment to the JobMaker Nomination Paycode. See Adding Paycodes below.
Period Reporting
At the end of each JobMaker Period you need to:
- Confirm via STP if each JobMaker Employee met the 20 average hours per week paid or worked.
- Process a claim for the JobMaker payments from the ATO. This can be performed via the ATO Business Portal of via your Tax Accountant.
The JobMaker Periods and claim windows are:
| JobMaker Program Period | JobMaker Period | Claim Dates | STP Paycodes 20hr Confirmation | ||
|---|---|---|---|---|---|
| From | To | From | To | ||
| Period 1 | 07/10/2020 | 06/01/2021 | 01/02/2021 | 30/04/2021 | JMHC-P01 |
| Period 2 | 07/01/2021 | 06/04/2021 | 01/05/2021 | 31/07/2021 | JMHC-P02 |
| Period 3 | 07/04/2021 | 06/07/2021 | 02/08/2021 | 31/10/2021 | JMHC-P03 |
| Period 4 | 07/07/2021 | 06/10/2021 | 01/11/2021 | 31/01/2022 | JMHC-P04 |
| Period 5 | 07/10/2021 | 06/01/2022 | 01/02/2022 | 30/04/2022 | JMHC-P05 |
| Period 6 | 07/01/2022 | 06/04/2022 | 01/05/2022 | 31/07/2022 | JMHC-P06 |
| Period 7 | 07/04/2022 | 06/07/2022 | 01/08/2022 | 31/10/2022 | JMHC-P07 |
| Period 8 | 07/07/2022 | 06/10/2022 | 01/11/2022 | 31/01/2023 | JMHC-P08 |
JobMaker Average Hours Test
The process to confirm a JobMaker employee met the 20 weekly average hours is performed via a 1c payment to a special PayCode.
From Reporting – On-Demand – Run a Transaction Data (Excel) report for the JobMaker Period.
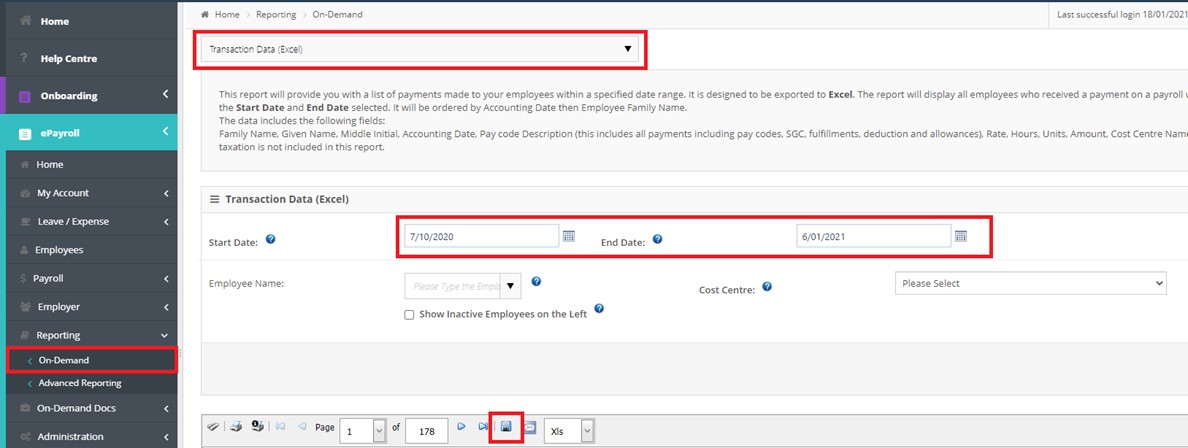
Download and open in Excel.
Select Cell A1 and Insert a Pivot table
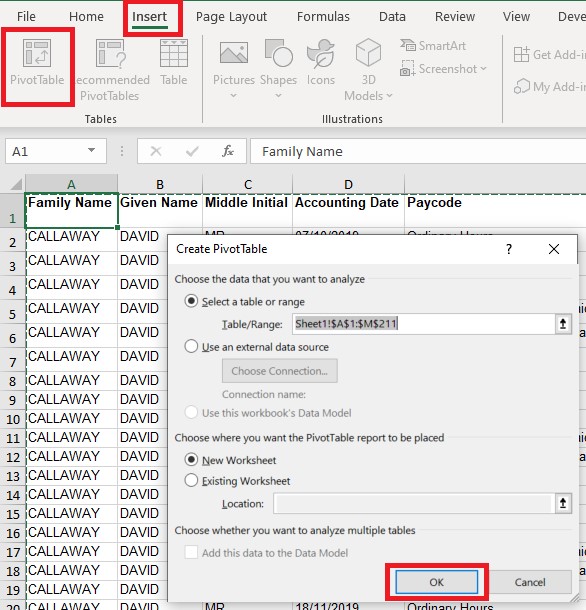
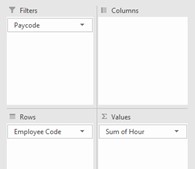
Configure your Pivot tables with the following fields
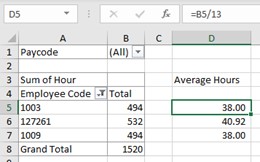
Next to each JobMaker employee add a formula to divide their total hours by 13.
At least 4 days before the end of a JobMaker period end you need to confirm to the ATO the employees that met the 20 average weekly hours that you wish to claim for. You will need to process a 1c payment to the JobMaker Period PayCode for each eligible employee to notify the ATO they met the minimum 20 hours average.
This can be done in your regular payroll processing or in an Ad-hoc payroll.
JobMaker Period Reporting
During the period end claim you will need to generate a Headcount & Payroll Dollars reports as per the initial registration but for the corresponding JobMaker periods.
You can generate these yourself using the process above.
Adding JobMaker Paycodes
1. Add Paycodes to your configuration
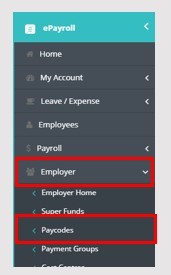
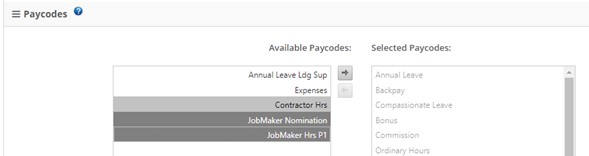
After logging into ePayroll, go to Employer – Paycodes:
Select the Paycodes in the drop down and click Add Paycode:
- JobMaker Nomination
- JobMaker Hours P#

2. Add the Paycodes to Payment Group
Employer – Payment Groups
Repeat for each Payment group that requires the paycodes to be added to them.
Click Edit, Scroll to the bottom and Add the PayCodes to the payment group by selecting them and clicking the arrow to move them to the right-hand box.
Scroll to the bottom and click the Save Changes button.
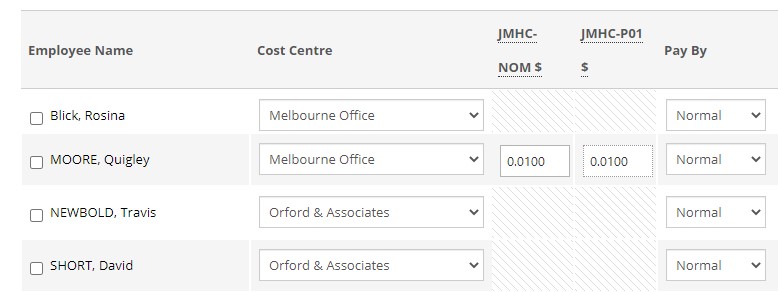
3. Add Paycodes to Employees
Employees Repeat for each employee that needs the appropriate paycodes.
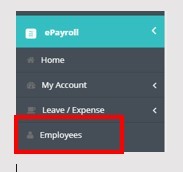
Select Employees from the main menu
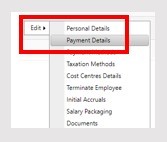
Click Edit next to the employee’s name and select Payment Details
Scroll down the page and tick the appropriate paycodes
Processing Payroll
When processing the payroll, you need to put 1c payment into the PayCode once only.
Once this 1c payment has been made and lodged via STP to the ATO you can remove the PayCode from the employee and the payment group.
Additional Resources
| Resource Name | Type |
|---|---|
| ReadyTech JobMaker Webinar | Webinar |