
In this topic
Introduction
This topic outlines how to configure your system for STP version 2.
STP v2 introduces more flexibility and additional detail, allowing for information to be shared with Services Australia to remove administrative burdens for both Employers and Employees.
Advantages for Employers include:
-No need to provide Separation Certificates to employees that terminate
-No need to report Child Support payments & Garnishees to Services Australia
-More timely exception notifications from the ATO around errors in Superannuation calculations
Advantages for Employees include:
-Quicker processing times for Services Australia (Centrelink) benefits
-More accurate Benefit calculations, which will result in fewer debts that need to be paid back
-More accurate prefill information into their Income Tax Returns.
There are a number of steps required to enable STP2 on your system:
-
Go to the Employer → STP2 Configuration screen.
-
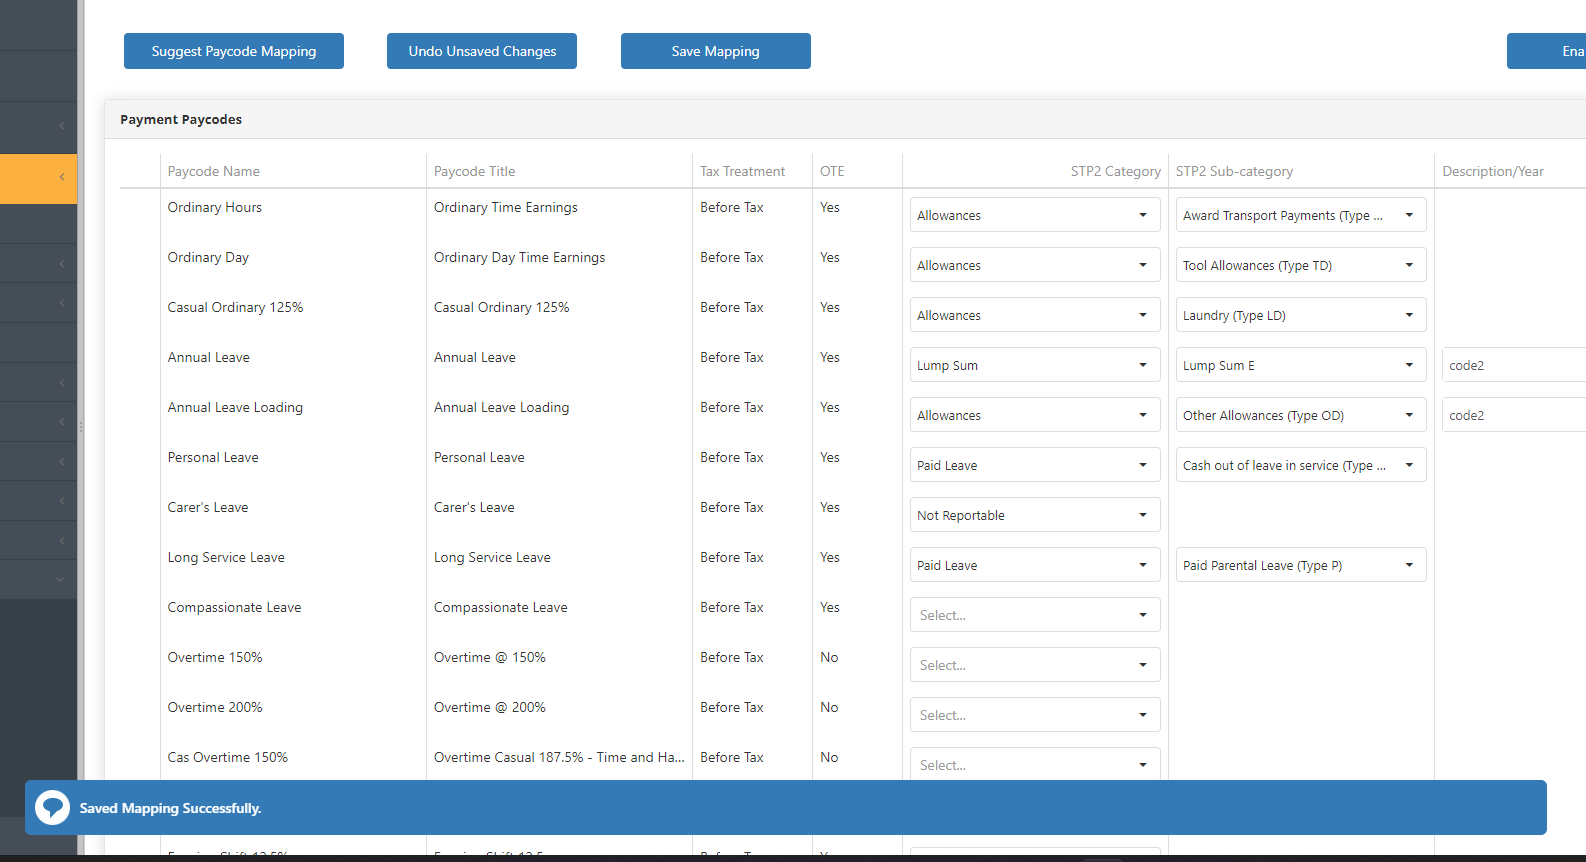
Map your Paycodes and Fulfilments to the appropriate STP2 Category.
-
Save your mappings.
-
Select Enable STP2.
NOTE: You must have the Employer Authority or Employer Authority Limited web role to be able to access this screen.
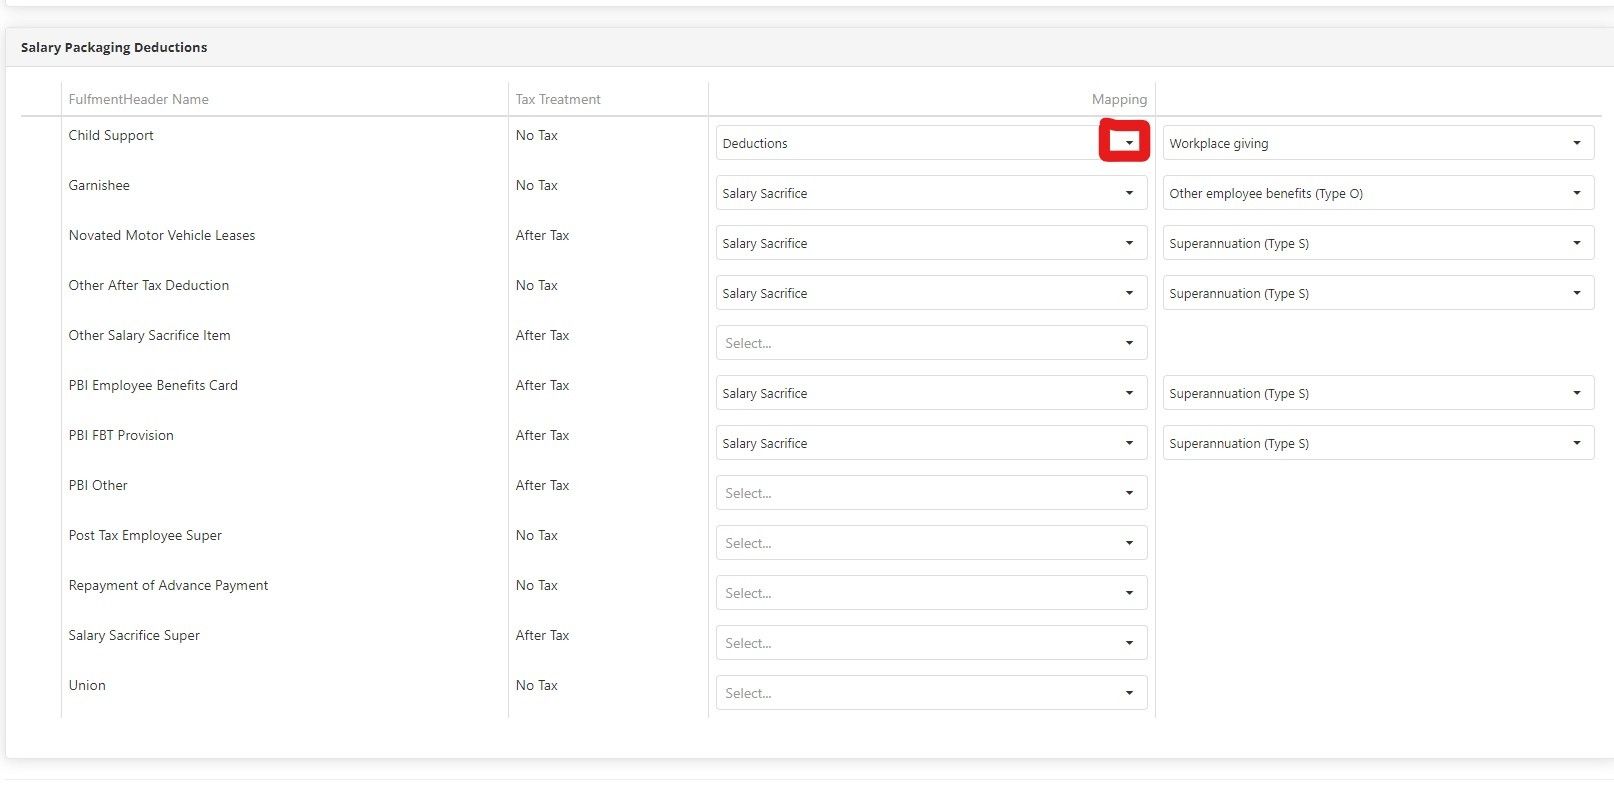
Mapping Paycodes and Fulfilments
To begin preparing your system to report under the STP2 requirements:
-
Go to the Employer → STP2 Configuration screen.
-
All existing Paycodes and Fulfilments in your system will be listed. These will need to be mapped to the appropriate STP2 Category for purposes of reporting to the ATO.
-
There are several options of mapping:
a. You can manually map Paycodes and Fulfilments to an STP2 Category by selecting the appropriate option from the inline dropdowns.
b. Alternatively, you can select the Suggested Mapping button and it will automatically pre-fill Paycodes and Fulfilments with a proposed STP2 mapping based on logic in the backend.
NOTE: These are just suggestions, you should review and confirm each mapping before saving it.
NOTE: Also, there may be instances where the logic is unable to propose a mapping for a Paycode or Fulfilment. In that case, you will need to manually select the appropriate mapping.
- Once all relevant Paycodes and Fulfilments are mapped to an STP2 Category, select the Save Mapping button to save your changes.
NOTE: You can come back to the STP2 Configuration screen at any time to re-map new or existing Paycodes/Fulfilments. Just ensure you always save your changes by selecting the Save Mapping button.
If you DO NOT save your mappings and refresh/ exit the screen, you will lose all your work and will have to re-map. If you intentionally want to clear your mapping, you can either select the Revert Unsaved Changes button, or refresh the webpage.
Enabling STP2
- Once you have mapped all relevant Paycodes and Fulfilments to their corresponding STP2 Category, and you have saved your mapping, you can then select the “Enable STP2” button.
- A prompt will appear once you’ve selected to Enable STP2, which will advise you that if you confirm, the decision cannot be undone. That is, you cannot disable STP2.
- If you select Confirm in the prompt, the system will enable STP2 and display the financial year that you enabled it in the STP2 Configuration screen. All subsequent payrolls will be reported to the ATO under STP2 requirements.
- If you select Cancel in the prompt, no further action will occur and you will be returned to the STP2 Configuration screen.