
In this topic
- Introduction
- Initial configuration of the NetSuite Integration
- Updating the configuration of the NetSuite integration
- Viewing the Journal ID for sent data
- Resending payroll data to NetSuite
- Known NetSuite errors and warnings
Introduction
This section outlines the steps that you will need to follow in order to setup your payroll account to automatically post your payroll data into a journal entry in your Netsuite system.
Initial configuration of the NetSuite Integration
There are two steps to configuring your NetSuite integration, these are:
- Creating a NetSuite user account
- Obtaining a Key from NetSuite
- Linking your NetSuite Account to Ready pay (powered by ePayroll)
After the configuration has been completed, your journal entries will automatically appear in NetSuite. You will also be able to view the ID and access the NetSuite journal directly from within Ready pay (powered by ePayroll) or re-send the journal entry to NetSuite if required.
Creating a NetSuite User Account
In late 2018, NetSuite introduced mandatory multifactor authentication for NetSuite ‘Administrator level’ accounts. As a side effect of this change, ‘Administrator’ level accounts can no longer be used to connect to Netsuite via API because there is no way for the MFA requirements to be met.
A special non-administrator NetSuite user role and user account will generally need to be created to be used in the integration between NetSuite and Ready pay (powered by ePayroll).
Note: While every effort is made to ensure the accuracy of the information in this section, as Netsuite is a third party product, our knowledge of Netsuite is limited and these instructions we may not be notified by NetSuite when there is a change to their systems/process.
The new role will need to have the following permissions:
| Type | Name | Level |
|---|---|---|
| Transactions | Make Journal Entry | Full |
| Lists | Accounts | View |
| Lists | Classes | View |
| Lists | Companies | View |
| Lists | Departments | View |
| Lists | Locations | View |
| Lists | Subsidiaries* | View |
| Setup | Web Services | Full |
* The Lists -> Subsidiaries role is not available on all accounts. If you are not using Subsidiaries on your Netsuite account, then this role is not required.
To create a new role in NetSuite, you’ll need to:
- Log in to NetSuite with an Administrator level account
-
Go to the Setup -> Users/Roles -> Manage Roles screen
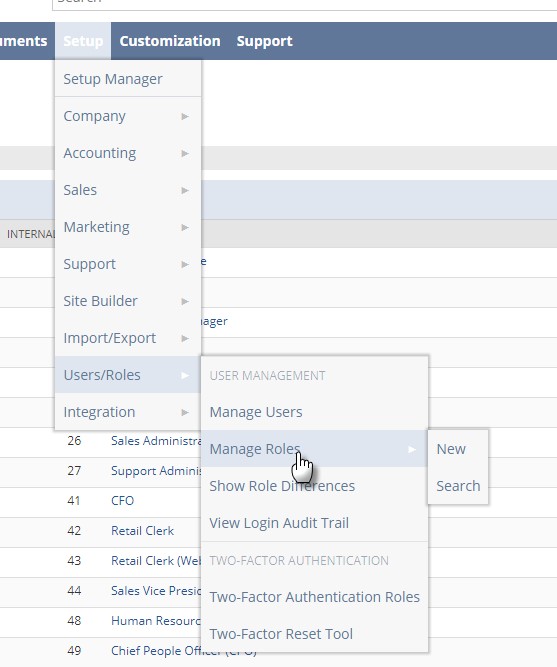
-
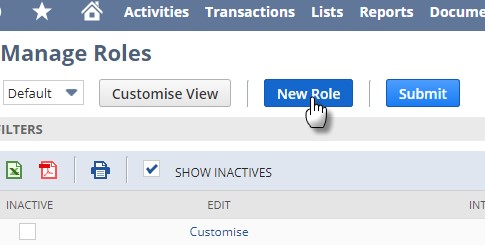
Click the New Role button
-
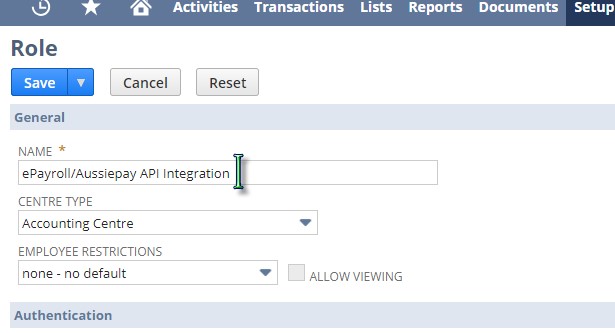
Give the new role a name, for example Ready pay (powered by ePayroll) API Integration
-
In the Authentication section, ensure that the Web Services Only Role is ticked. Other options should use their default values as shown:

-
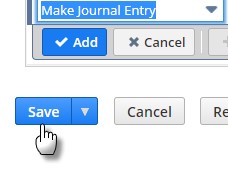
Add the required Permissions to the account (see above table of permissions)

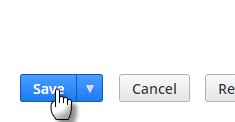
- After adding all of the required permissions, click the Save button to create the role.
To assign the new role to a NetSuite user:
NOTE: You can add the new role to an existing Netsuite user or you can create a new one. These instructions assume that you already have a Netsuite user to assign the new role to. If you need to create a new user in Netsuite, you will need to refer to the Netsuite help documentation.
IMPORTANT: We recommend that you configure a NetSuite user account to be used specifically for the integration with Ready pay (powered by ePayroll). You should not use an actual user’s account for the integration to minimise disruption should that user leave your organisation.
-
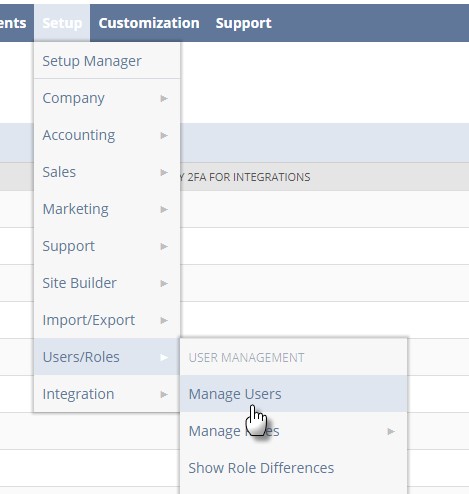
Go to the Setup -> Users/Roles -> Manage Users screen
-
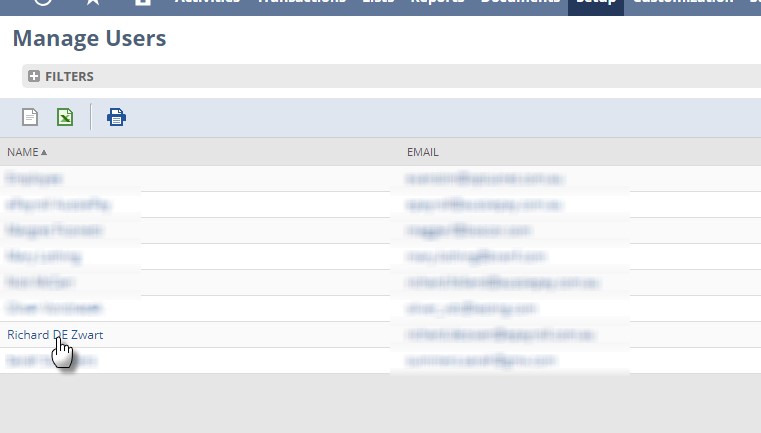
Choose the user account to be used in the Ready pay (powered by ePayroll) integration
-
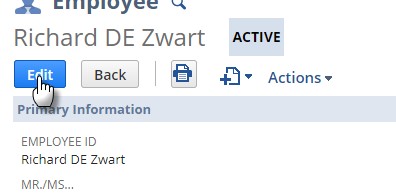
Click the Edit button at the top of the screen
-
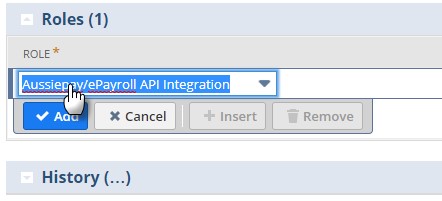
Scroll down to the Roles section, choose the role you created above and click the Add button
-
Scroll to the bottom of the paghe and click the Save button
Obtain a key from NetSuite
To obtain a NetSuite key you will need to:
- Log in to your NetSuite account as usual
-
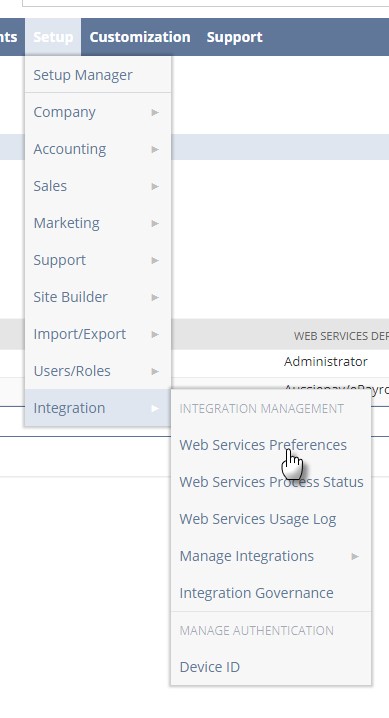
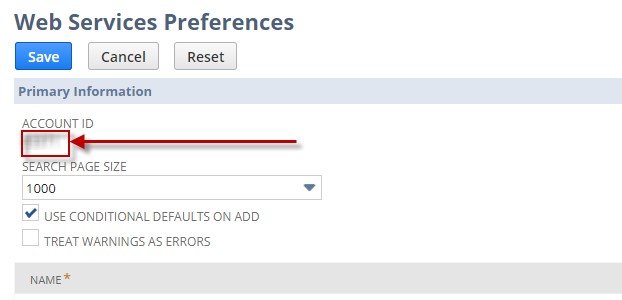
Go to the Setup -> Integration -> Web Services Preferences screen
- Make a note of the Account ID
Linking your NetSuite account to Ready pay (powered by ePayroll)
- Log on to Ready pay (powered by ePayroll)
-
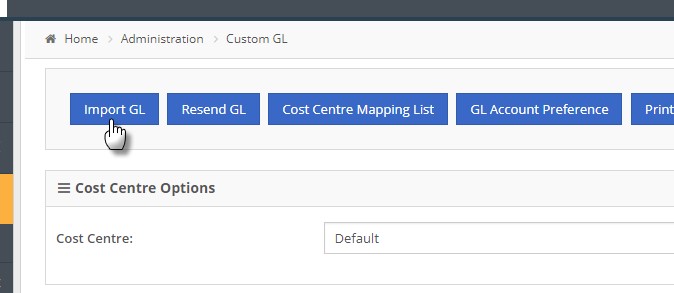
Go to the Administration -> Custom GL screen
Note: If you have not previously set up your General Ledger Intergration, you will be shown the Accounting System Automatic Import screen. If you have previously set up your General Ledger Integration and are making a change, then you will need to click the Import GL button at the top of the screen.
- Select the NetSuite radio button
- Enter your NetSuite email address into the Email field
- Your NetSuite password into the Password field
- Your NetSuite Account ID into the Account Key field
- Click the Next button at the bottom of the page
- On the Mapping Options screen, your payroll cost centres will automatically be mapped to your NetSuite departments. You should change this if required. You’ll also need to indicate whether you want to include location and class in your journals.
-
Click the Next button
NOTE: If you receive any errors at the top of the screen after clicking next, these are generally errors that are returned from the NetSuite API. Although API errors are rare, if they do occur, you should check your NetSuite help documentation or contact NetSuite support as a first point of contact.
- Untick any NetSuite GL accounts that you do not wish to import into the payroll system
- Click the Import button
- Map your paycodes and liabilities to a GL account using the instructions at Mapping the Payroll to GL Accounts.
Updating the configuration of the NetSuite integration
From time to time you may need to update the details of your integration, for example:
- When changing the details of your integration NetSuite user account
- If you have added additional locations, classes, departments, or GL accounts into NetSuite
Updating your integration credentials
If you need to update your NetSuite integration credentials in Ready pay (powered by ePayroll) you should:
- Go to the Administration -> Custom GL screen in Ready pay (powered by ePayroll)
- Click the Import GL button at the top of the screen
- Update the Email Address, Password or Account Key if required
-
Click Next on the remaining screens in the wizard to save the updated credentials.
Note: If you are updating the email address or account key, you will need to re-map your GL afterwards. When changing the email address or account key that is used for the integration, all integration data is removed to ensure that data is not unintentionally leaked if the new user does not have the same access. We recommend using a NetSuite account that is not linked to an actual NetSuite user so that there is never a need to change the email address or account key.
If you are only changing the password then your mapping will be retained and you will not need to re-map anything.
Adding additional locations, classes, departments or GL Accounts
If you need to update your NetSuite integration credentials in Ready pay (powered by ePayroll) you should:
- Go to the Administration -> Custom GL screen in Ready pay (powered by ePayroll)
- Click the Import GL button at the top of the screen
- Click Next on the Integration selection screen (ensuring not to change to any other integration type)
- Update the NetSuite Mapping Options if required then click Next
- Tick any new locations, classes, departments or GL codes as required, then click Next
-
Click the Import button to import the additional items
Note: You will not be required to re-map any items after performing these steps.
Updating the location, class and department mapping
Each cost centre in Ready pay (powered by ePayroll) needs to be mapped to at least one NetSuite Department, Location or Class.
Cost Centres can also be mapped to a combination of these, e.g. ‘Cost Centre A’ could be mapped to ‘NetSuite Department 1’/’NetSuite Location 1’ and ‘Cost Centre B’ may be mapped to ‘NetSuite Department 1’/’NetSuite Location 2’.
If you need to update how your locations, classes and departments are mapped to cost centres in Ready pay (powered by ePayroll) you should:
- Go to the Administration -> Custom GL screen in Ready pay (powered by ePayroll)
- Click the Cost Centre Mapping List button at the top of the screen
- Tick any additional dimensions that you will map your cost centres against (e.g. if your standard dimension is mapping, you will have the option of also mapping against the Location and/or Class dimensions if you want to.
-
For each cost centre in Ready pay (powered by ePayroll), specify a Department, Location and/or Class as required, using the dropdowns
Note: All cost centres will need to be mapped before you can save.
-
Click the Save Changes button to apply the updated mapping
Note: You will not be required to re-map any GL accounts items after performing these steps.
Viewing the Journal ID for sent data
If you need to view the journal ID for the data that was sent to NetSuite:
- Go to the Administration -> Custom GL screen
- Click the Resend GL button at the top of the screen
- You will see a list of all payrolls and a Journal ID for the data that was sent for each payroll
- Click on the Journal ID to be taken directly to the Journal in NetSuite
Resending payroll data to NetSuite
If you need to resend payroll data to NetSuite (for example if there was a failure of some kind):
- Go to the Administration -> Custom GL screen
- Click the Resend GL button at the top of the screen
- You will see a list of all payrolls and a Journal ID for the data that was sent for each payroll
- Find the payroll that you want to resend
- Click the Resend button to the right of that payroll
- Your journal entry will appear in Netsuite
Known NetSuite errors and warnings
| Type | Message | Notes |
|---|---|---|
| Error | No accounts were found on your NetSuite account. Please ensure that your account has the ‘Lists->Accounts’ permission and then try again. | Add the ‘Lists->Accounts’ permission to your NetSuite user role and ensure that the NetSuite account you’re using for the integration has the user role assigned to it. |
| Error | No classes were found on your NetSuite account. Please ensure that your account has the ‘Lists->Classes’ permission and then try again. | Add the ‘Lists->Classes’ permission to your NetSuite user role and ensure that the NetSuite account you’re using for the integration has the user role assigned to it. |
| Error | No companies were found on your NetSuite account. Please ensure that your account has the ‘Lists->Companies’ permission and then try again. | Add the ‘Lists->Companies’ permission to your NetSuite user role and ensure that the NetSuite account you’re using for the integration has the user role assigned to it. |
| Error | No departments were found on your NetSuite account. Please ensure that your account has the ‘Lists->Departments’ permission and then try again. | Add the ‘Lists->Departments’ permission to your NetSuite user role and ensure that the NetSuite account you’re using for the integration has the user role assigned to it. |
| Error | No locations were found on your NetSuite account. Please ensure that your account has the ‘Lists->Locations’ permission and then try again. | Add the ‘Lists->Locations’ permission to your NetSuite user role and ensure that the NetSuite account you’re using for the integration has the user role assigned to it. |
| Warning | No subsidiaries were found on your NetSuite account. If you have subsidiaries configured in NetSuite, please ensure that your account has the ‘Lists->Subsidiaries’ permission and then try again. | If you are using subsidiaries on your NetSuite account then your user role is missing the Lists->Subsidiaries permission. This message can be ignored if you are not using subsidiaries in NetSuite. |
| Error | You have entered an invalid email address or password. Please try again. | This means that the account credentials provided for your NetSuite account did not authenticate successfully. Check the details entered on the first ‘Import GL screen’. The email address, password or account key could be incorrect. If these are correct, then your NetSuite account is not configured to allow API authentication. You will need to configure your account as per the above instructions. |
| Error | Only one request may be made against a session at a time | The NetSuite API integration uses a client’s NetSuite user account details for authentication. NetSuite only allows a user account to connect to its API once at any time. The message indicates that there is another system connecting to the API using these same credentials as those that were entered in Aussiepay OR that the NetSuite API is returning (for some reason) and invalid JSESSIONID. See below for troubleshooting tips. |
Troubleshooting the only one request may be made against a session at a time error
This message indicates that there is more than one integration utilising the credentials that are being used for the integration with Ready pay (powered by ePayroll), and both are attempting to access the API at the same time (or very near to the same time).
There are two options that may be useful before contacting NetSuite for further assistance.
- Identify the other web services that are using your API
Log into NetSuite and go to Set Up -> Integration -> Web Services Usage Log -> Web Services Process Status where you will see the logs for connections. If you can identify the other service(s) using the NetSuite API, disable that accounts access and try again in Ready pay (powered by ePayroll). If the problem is resolved you may need to configure separate user accounts for each integration. - Change the login credentials
If it’s not clear which other system is connecting to your NetSuite API, change your NetSuite password and email and then update Ready pay (powered by ePayroll). The other system will stop authenticating with the NetSuite API and should stop the NetSuite API from blocking Ready pay (powered by ePayroll)’s API requests.
If neither of these approaches helps to solve the issue, you will need to contact NetSuite for assistance.